Qt/C++ による GUI ソフト 7:レンダリング その2
Qt 3D とは,Qt/C++ と Qt/Quick の両方で 2D および 3D のレンダリング(カメラの視点からシーンを描画すること)をサポートするライブラリです.
本サイトで開発している分子モデリングソフトウェアのレンダリングエンジンを Qt 3D に変更する目的で勉強しています.
前ページ 5:レンダリング その1では,Qt 3D レンダリングをおこなう GUI ソフトの雛形を作成しました.
このページでは,その雛形を改良していきます.内容は,ライトの作成と設定,球の色付け,球へのピッキング(レンダリングされているオブジェクトをマウスで選択すること)機能の付与です,
このページのレンダリングには Qt 3D を使っていますが,これは廃止の方向に進んでいるようです.
GUI に Qt を使うなら,Qt Quick 3D あたりを練習する必要がありそうです.
インフォメーション
目次(ページ内リンク)
「5:レンダリング その1」で「シーンの改変(1)」を作成したので,(2)から始まります.- シーンの改変(2):ライトを 1 個生成し,簡単な設定をします
- シーンの改変(3):球に色を付けます
- シーンの改変(4):ピッキング(球をクリックして選択すること)できるようにします
- 補遺 レンダリングの設定メモ
インストールした Debian パッケージ
| パッケージ名(バージョン) | 注 |
| g++(14.2.0) | GNU C++ コンパイラ |
| make(4.4.1) | コンパイルを制御するユーティリティ |
| qt6-base-dev(6.8.2) | Qt6 アプリケーションのビルドに使用されるヘッダ開発ファイル |
| qt6-3d-dev(6.8.2) | Qt 3D ライブラリを使用した Qt6 アプリケーションのビルドに使用されるヘッダ開発ファイル |
シーンの改変(2)ライトの生成と設定
ソースコード
前ページで作成したソースコードの scene.cc のみ書き換えました.
ページが変わったので,全コードを記します.変更箇所は赤字で示し ます.
scene.h
#ifndef ___SCENE
#define ___SCENE

#include <Qt3DCore/QEntity>
#include <Qt3DExtras/QSphereMesh>
#include <Qt3DExtras/QPhongMaterial>

class Scene {
 private:
  Qt3DCore::QEntity *rootEntity;

 public:
  Scene();
  Qt3DCore::QEntity *get_root_entity() { return rootEntity; }
};

#endif
scene.cc
前ページで作成したソースコードの改版箇所はこのファイルのみです.
ここで Qt3DCore::QEntity *lightEntity としてライトを生成しているように見えますが,実際はQt3DCore::QEntity です.リファレンスマニュアル Qt3DCore::QEntity Class を見ると,Qt3DCore::QEntity オブジェクト自体は空のシェル(empty shell)であり,Qt3DCore::QEntity の動作は,参照される Qt3DCore::QComponent オブジェクトによって定義さる,と書いてあります.
ここでは,Qt3DRender::QPointLight class (点光源)を使っています.点光源は,単一の点から全方向に光を放射する光源のことで,電球をイメージすればよいそうです.
#include "scene.h"
#include <QTransform>
#include <QPointLight>

Scene::Scene()
 : rootEntity(nullptr)
{
 rootEntity = new Qt3DCore::QEntity;

 Qt3DRender::QMaterial *material = new Qt3DExtras::QPhongMaterial(rootEntity);

 Qt3DCore::QEntity *sphereEntity0 = new Qt3DCore::QEntity(rootEntity);

 Qt3DExtras::QSphereMesh *sphereMesh = new Qt3DExtras::QSphereMesh;
 sphereMesh->setRadius(3);
 sphereMesh->setGenerateTangents(true);

 sphereEntity0->addComponent(sphereMesh);
 sphereEntity0->addComponent(material);

 Qt3DCore::QEntity *sphereEntity1 = new Qt3DCore::QEntity(rootEntity);

 Qt3DCore::QTransform *pos1 = new Qt3DCore::QTransform(sphereEntity1);
 pos1->setTranslation(QVector3D(2.0f, 2.0f, 2.0f));
 pos1->translation();

 sphereEntity1->addComponent(sphereMesh);
 sphereEntity1->addComponent(material);
 sphereEntity1->addComponent(pos1);

//以下,ライト
 Qt3DCore::QEntity *lightEntity = new Qt3DCore::QEntity(rootEntity);  //これは単なる入れ物

 //ライトを点光源とする
 Qt3DRender::QPointLight *light = new Qt3DRender::QPointLight(lightEntity);
 light->setColor("white");
 light->setIntensity(1.0f);
 lightEntity->addComponent(light);

 //ライトの位置
 Qt3DCore::QTransform *lightPos = new Qt3DCore::QTransform(lightEntity);
 lightPos->setTranslation(QVector3D(-10.0f, 10.0f, 10.0f));
 lightPos->translation();
 lightEntity->addComponent(lightPos);
}
draw_window.h
#ifndef ___DRAW_WINDOW
#define ___DRAW_WINDOW

#include <Qt3DExtras>
#include <Qt3DRender/QCamera>

class Draw_Window : public Qt3DExtras::Qt3DWindow {
 protected:
  void mousePressEvent(QMouseEvent *event);

 public:
  Draw_Window();
};

#endif
draw_window.cc
#include "draw_window.h"
#include <iostream>

Draw_Window::Draw_Window() {
 Qt3DRender::QCamera *Camera = camera();
 Camera->lens()->setPerspectiveProjection(45.0f, 1.0f, 0.1f, 1000.0f);
 Camera->setPosition(QVector3D(0, 0, 20.0f));
 Camera->setViewCenter(QVector3D(0, 0, 0));
}

void Draw_Window::mousePressEvent(QMouseEvent *event) {
 std::cout << __PRETTY_FUNCTION__ << std::endl;

 std::cout << "type ; " << event->type() << std::endl;

 Qt::MouseButton button = event->button();
 std::cout << "button ; " << button << std::endl;

 QPointF point = event->position();
 std::cout << "point ; " << point.rx() << ' ' << point.ry() << std::endl;
}
main_window.h
#include "scene.h"
#include "draw_window.h"
#include <QMainWindow>
#include <QMenuBar>

class Main_Window : public QMainWindow {
 private:
  QMenuBar *menu_bar;
  QMenu *file_menu;
  QMenu *view_menu;  QAction *action_quit;

  Draw_Window *DrawWindow;
  Scene Scene0;

 public:
  Main_Window(QWidget *parent = nullptr, Qt::WindowFlags f = Qt::WindowFlags());
};
main_window.cc
#include "main_window.h"
#include "draw_window.h"
#include <QHBoxLayout>

Main_Window::Main_Window(QWidget *parent, Qt::WindowFlags f)
 : QMainWindow(parent, f),
   menu_bar(menuBar())
{
 resize(300, 300);

 file_menu = new QMenu("ファイル(&F)", this);
 menu_bar->addMenu(file_menu);

 action_quit = new QAction("終了(&Q)", this);
 file_menu->addAction(action_quit);

 connect(action_quit, SIGNAL(triggered()), this, SLOT(close()));

 QWidget *central_widget = new QWidget(this);
 setCentralWidget(central_widget);
 QHBoxLayout *central_layout = new QHBoxLayout(central_widget);

 DrawWindow = new Draw_Window;
 QWidget *widget = QWidget::createWindowContainer(DrawWindow);
 central_layout->addWidget(widget);

 Qt3DCore::QEntity *root = Scene0.get_root_entity();
 DrawWindow->setRootEntity(root);
}
main.cc
#include "scene.h"
#include "main_window.h"
#include <QApplication>

int main(int argc, char *argv[]) {
 QApplication app(argc, argv);

 Main_Window window(nullptr, Qt::Window);
 window.show();

 return app.exec();
}
tmp.pro
TEMPLATE = app
TARGET = my_window
INCLUDEPATH += .
QT += widgets
QT += 3dextras
SOURCES += main.cc main_window.cc draw_window.cc scene.cc
HEADERS += main_window.h draw_window.h scene.h
ビルドと実行
1:メインウィンドウ以来同じ手順です.ソースファイルが tmp というディテクトリにあるとします.
~/tmp$ qmake6
~/tmp$ make
~/tmp$ ./my_window &
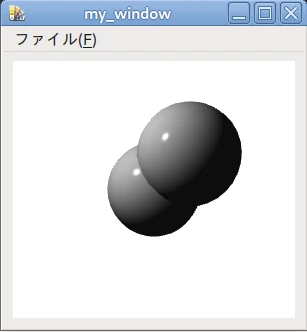
作成した光源からの光が反射している画像が得られました.
シーンの改変(3)球に色を付ける
ソースコード
scene.cc
球を着色するのに Qt3DExtras::QDiffuseSpecularMaterial Class を使いました.これは,フォン照明効果を提供するクラスです.解説を引用します.
フォン照明効果は,アンビエント,ディフューズ,スペキュラという 3 つの照明要素を組み合わせたものです.このクラスは,OpenGL 2,OpenGL 3,および OpenGL ES 2 以上の技術を提供します.
- アンビエント:他の光源がない場合にオブジェクトから放射される色
- ディフューズ:ライトによる粗い表面の反射で放射される色
- スペキュラ:ライトによる光沢のある表面の反射で放射される色
このコードでは,setDiffuse() 関数を使い,ディフューズを設定しています.setSpecular() 関数や setAmbient() 関数もあります.
#include "scene.h"
#include <QTransform>
#include <QPointLight>
#include <QDiffuseSpecularMaterial>

Scene::Scene()
 : rootEntity(nullptr)
{
 rootEntity = new Qt3DCore::QEntity;

 Qt3DRender::QMaterial *material = new Qt3DExtras::QPhongMaterial(rootEntity);

 Qt3DCore::QEntity *sphereEntity0 = new Qt3DCore::QEntity(rootEntity);

 Qt3DExtras::QSphereMesh *sphereMesh = new Qt3DExtras::QSphereMesh;
 sphereMesh->setRadius(3);
 sphereMesh->setGenerateTangents(true);

 //球 0 の色を設定する
 Qt3DExtras::QDiffuseSpecularMaterial *sphereColor0 = new Qt3DExtras::QDiffuseSpecularMaterial(sphereEntity0);
 sphereColor0->setDiffuse(QColor(QRgb(0xFF0000)));

 sphereEntity0->addComponent(sphereMesh);
 sphereEntity0->addComponent(material);
 sphereEntity0->addComponent(sphereColor0);

 Qt3DCore::QEntity *sphereEntity1 = new Qt3DCore::QEntity(rootEntity);

 Qt3DCore::QTransform *pos1 = new Qt3DCore::QTransform(sphereEntity1);
 pos1->setTranslation(QVector3D(2.0f, 2.0f, 2.0f));
 pos1->translation();

 //球 1 の色を設定する
 Qt3DExtras::QDiffuseSpecularMaterial *sphereColor1 = new Qt3DExtras::QDiffuseSpecularMaterial(sphereEntity0);
 sphereColor1->setDiffuse(QColor(QRgb(0x00FF00)));

 sphereEntity1->addComponent(sphereMesh);
 sphereEntity1->addComponent(material);
 sphereEntity1->addComponent(pos1);
 sphereEntity1->addComponent(sphereColor1);

 Qt3DCore::QEntity *lightEntity = new Qt3DCore::QEntity(rootEntity);

 Qt3DRender::QPointLight *light = new Qt3DRender::QPointLight(lightEntity);
 light->setColor("white");
 light->setIntensity(1.0f);
 lightEntity->addComponent(light);

 Qt3DCore::QTransform *lightPos = new Qt3DCore::QTransform(lightEntity);
 lightPos->setTranslation(QVector3D(-10.0f, 10.0f, 10.0f));
 lightPos->translation();
 lightEntity->addComponent(lightPos);
}
ビルドと実行
上と同じ手順です.
~/tmp$ qmake6
~/tmp$ make
~/tmp$ ./my_window &
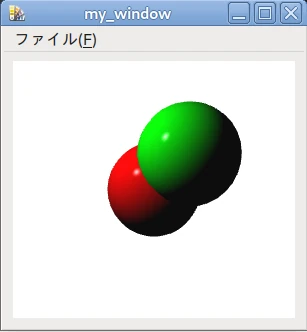
球に色が付きました
ピッキング
このセクションでは,QEntity のインスタンスに識別番号を与えて,ピッキング操作で端末に出力します.
以下のコーディングで QEntity はピッキングできるようになります.
- ピッキングされる QEntity を作成するクラスを,QObject クラスの継承クラスとする
- QEntity の作成とともに,そのコンポーネントとして QObjectPicker を作成して追加する
- ピッキングで呼び出されるスロット関数を定義する
- QObjectPicker と スロットとをコネクトする
QObjectPicker Class のページに記されている注意事項を引用しておきます.
- QObjectPicker クラスのインスタンスは共有してはならない.これを守らないと未定義の動作が起こるかもしれない
- カメラの遠方平面の値はピッキングに影響する.およそ 100000 より大きくなると,浮動小数点の精度により不正確な結果となる
ソースコード
scene.h
ピッキングされる QEntity を作成するクラスは,QObject クラスの継承クラスにする必要があります.
Q_OBJECT マクロではコンパイルエラーになりました.
#ifndef ___SCENE
#define ___SCENE

#include <Qt3DCore/QEntity>
#include <Qt3DExtras/QSphereMesh>
#include <Qt3DExtras/QPhongMaterial>
#include <iostream>

class Scene : public QObject {
 private:
  Qt3DCore::QEntity *rootEntity;

 private slots:
  void slot_clicked(int i);  //球をクリックしたときに呼び出される,引数付きのスロット

 public:
  Scene();
  Qt3DCore::QEntity *get_root_entity() { return rootEntity; }
};

#endif
scene.cc
シグナルとスロットで触れたのですが,QObject Class には,Static Public Members として以下の connect() 関数が挙げられています.
- QMetaObject::Connection connect(const QObject *sender, const QMetaMethod &signal, const QObject *receiver, const QMetaMethod &method, Qt::ConnectionType type = Qt::AutoConnection)
- QMetaObject::Connection connect(const QObject *sender, const char *signal, const QObject *receiver, const char *method, Qt::ConnectionType type = Qt::AutoConnection)
- QMetaObject::Connection connect(const QObject *sender, PointerToMemberFunction signal, Functor functor)
- QMetaObject::Connection connect(const QObject *sender, PointerToMemberFunction signal, const QObject *context, Functor functor, Qt::ConnectionType type = Qt::AutoConnection)
- QMetaObject::Connection connect(const QObject *sender, PointerToMemberFunction signal, const QObject *receiver, PointerToMemberFunction method, Qt::ConnectionType type = Qt::AutoConnection)
ここではシグナルをスロットに送信する際に,識別番号も送る必要があります.そこで,3 番めの書式を使いました.コードにはラムダ式を記述していますが,コンパイラがラムダ式をファンクタに展開するらしいです.
#include "scene.h"
#include <QTransform>
#include <QPointLight>
#include <QDiffuseSpecularMaterial>
#include <QObjectPicker>

Scene::Scene()
 : rootEntity(nullptr)
{
 rootEntity = new Qt3DCore::QEntity;

 Qt3DRender::QMaterial *material = new Qt3DExtras::QPhongMaterial(rootEntity);

 Qt3DCore::QEntity *sphereEntity0 = new Qt3DCore::QEntity(rootEntity);

 Qt3DExtras::QSphereMesh *sphereMesh = new Qt3DExtras::QSphereMesh;
 sphereMesh->setRadius(3);
 sphereMesh->setGenerateTangents(true);

 Qt3DExtras::QDiffuseSpecularMaterial *sphereColor0 = new Qt3DExtras::QDiffuseSpecularMaterial(sphereEntity0);
 sphereColor0->setDiffuse(QColor(QRgb(0xFF0000)));

 //ピッカーの作成
 int id0 = 123;  //識別番号
 Qt3DRender::QObjectPicker *picker0 = new Qt3DRender::QObjectPicker(sphereEntity0);
 connect(picker0, &Qt3DRender::QObjectPicker::clicked, [this, id0]() { slot_clicked(id0); });  //引数付きのスロットと接続.ラムダ式を使っている

 sphereEntity0->addComponent(sphereMesh);
 sphereEntity0->addComponent(material);
 sphereEntity0->addComponent(sphereColor0);
 sphereEntity0->addComponent(picker0);

 Qt3DCore::QEntity *sphereEntity1 = new Qt3DCore::QEntity(rootEntity);

 Qt3DCore::QTransform *pos1 = new Qt3DCore::QTransform(sphereEntity1);
 pos1->setTranslation(QVector3D(2.0f, 2.0f, 2.0f));
 pos1->translation();

 Qt3DExtras::QDiffuseSpecularMaterial *sphereColor1 = new Qt3DExtras::QDiffuseSpecularMaterial(sphereEntity0);
 sphereColor1->setDiffuse(QColor(QRgb(0x00FF00)));

 //ピッカーの作成
 int id1 = 456;  //識別番号
 Qt3DRender::QObjectPicker *picker1 = new Qt3DRender::QObjectPicker(sphereEntity1);
 connect(picker1, &Qt3DRender::QObjectPicker::clicked, [this, id1]() { slot_clicked(id1); });  //引数付きのスロットと接続.ラムダ式を使っている

 sphereEntity1->addComponent(sphereMesh);
 sphereEntity1->addComponent(material);
 sphereEntity1->addComponent(pos1);
 sphereEntity1->addComponent(sphereColor1);
 sphereEntity1->addComponent(picker1);

 Qt3DCore::QEntity *lightEntity = new Qt3DCore::QEntity(rootEntity);

 Qt3DRender::QPointLight *light = new Qt3DRender::QPointLight(lightEntity);
 light->setColor("white");
 light->setIntensity(1.0f);
 lightEntity->addComponent(light);

 Qt3DCore::QTransform *lightPos = new Qt3DCore::QTransform(lightEntity);
 lightPos->setTranslation(QVector3D(-10.0f, 10.0f, 10.0f));
 lightPos->translation();
 lightEntity->addComponent(lightPos);
}

void Scene::slot_clicked(int i) {
 std::cout << __PRETTY_FUNCTION__ << std::endl;
 std::cout << "picked id : " << i << std::endl;
}
ビルドと実行
上と同じ手順です.
~/tmp$ qmake6
~/tmp$ make
~/tmp$ ./my_window &
赤色の球をクリックし,続いて緑色の球をクリックしたときの出力例を示します.
virtual void Draw_Window::mousePressEvent(QMouseEvent*) 以下 4 行は 5:イベント処理 で実装したイベントハンドラです.
画面をクリックしたときのイベントの種類,マウスボタン,およびイベントが発生した位置を出力しています.
void Scene::slot_clicked(int) 以下 2 行がピックにより呼び出されるスロット関数です.赤い球に設定した 123 という 識別番号 と,緑色の球に設定した 456 という 識別番号 が出力されました.
virtual void Draw_Window::mousePressEvent(QMouseEvent*)
type ; 2
button ; 1
point ; 123 121
void Scene::slot_clicked(int)
picked id : 123
virtual void Draw_Window::mousePressEvent(QMouseEvent*)
type ; 2
button ; 1
point ; 137 107
void Scene::slot_clicked(int)
picked id : 456
補遺 レンダリングの設定メモ
 Qt3DRender::QRenderSurfaceSelector *SurfaceSelector = new Qt3DRender::QRenderSurfaceSelector(RootEntity);
 setActiveFrameGraph(SurfaceSelector);

 Qt3DRender::QViewport *Viewport = new Qt3DRender::QViewport(SurfaceSelector);

 Qt3DRender::QCameraSelector *CameraSelector = new Qt3DRender::QCameraSelector(Viewport);
 CameraSelector->setCamera(CameraEntity);

 #物体の表しか描かない
 Qt3DRender::QCullFace *CullFace = new Qt3DRender::QCullFace(RootEntity);
 CullFace->setMode(Qt3DRender::QCullFace::Front);

 #物体の向こう側に隠れている物体は描かない
 Qt3DRender::QDepthTest *DepthTest = new Qt3DRender::QDepthTest(RootEntity);
 DepthTest->setDepthFunction(Qt3DRender::QDepthTest::Less);

 Qt3DRender::QRenderStateSet *RenderStateSet = new Qt3DRender::QRenderStateSet(CameraSelector);
 RenderStateSet->addRenderState(CullFace);
 RenderStateSet->addRenderState(DepthTest);

//背景の色.設定しなければ(== デフォルトなら)黒
 Qt3DRender::QClearBuffers *ClearBuffers = new Qt3DRender::QClearBuffers(CameraSelector);
 ClearBuffers->setBuffers(Qt3DRender::QClearBuffers::ColorDepthBuffer);
 ClearBuffers->setClearColor(Qt::white);